6 Prototype Examples for your Application

6 examples of Prototypes for your Application


How do you turn Optimism into Confidence without breaking the bank? 

When it comes to developing digital products like a mobile app or web application your option is to spend a lot of time and money to build it and hope you got it right or create a cost effective prototype to prove you got it right before scaling.  But “cost effective” is certainly a relative term and what is cost effective for one company or startup or entrepreneur may be completely out of the realm of affordability for another.  So we explore 6 examples of prototypes examples for your application or digital product idea ranging from free to hundreds of thousands of dollars, the pros and cons of each, who they are best for, and most importantly their impact.


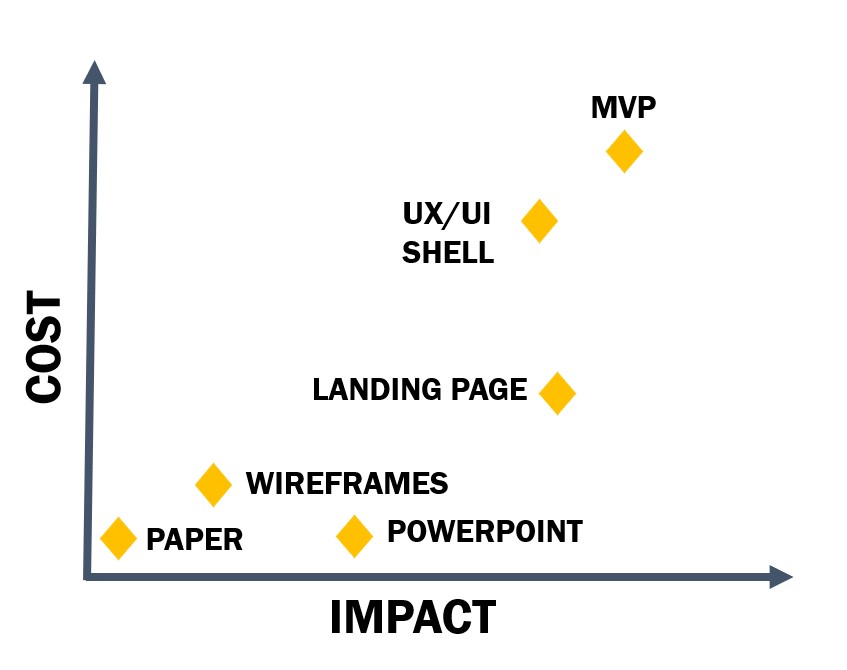
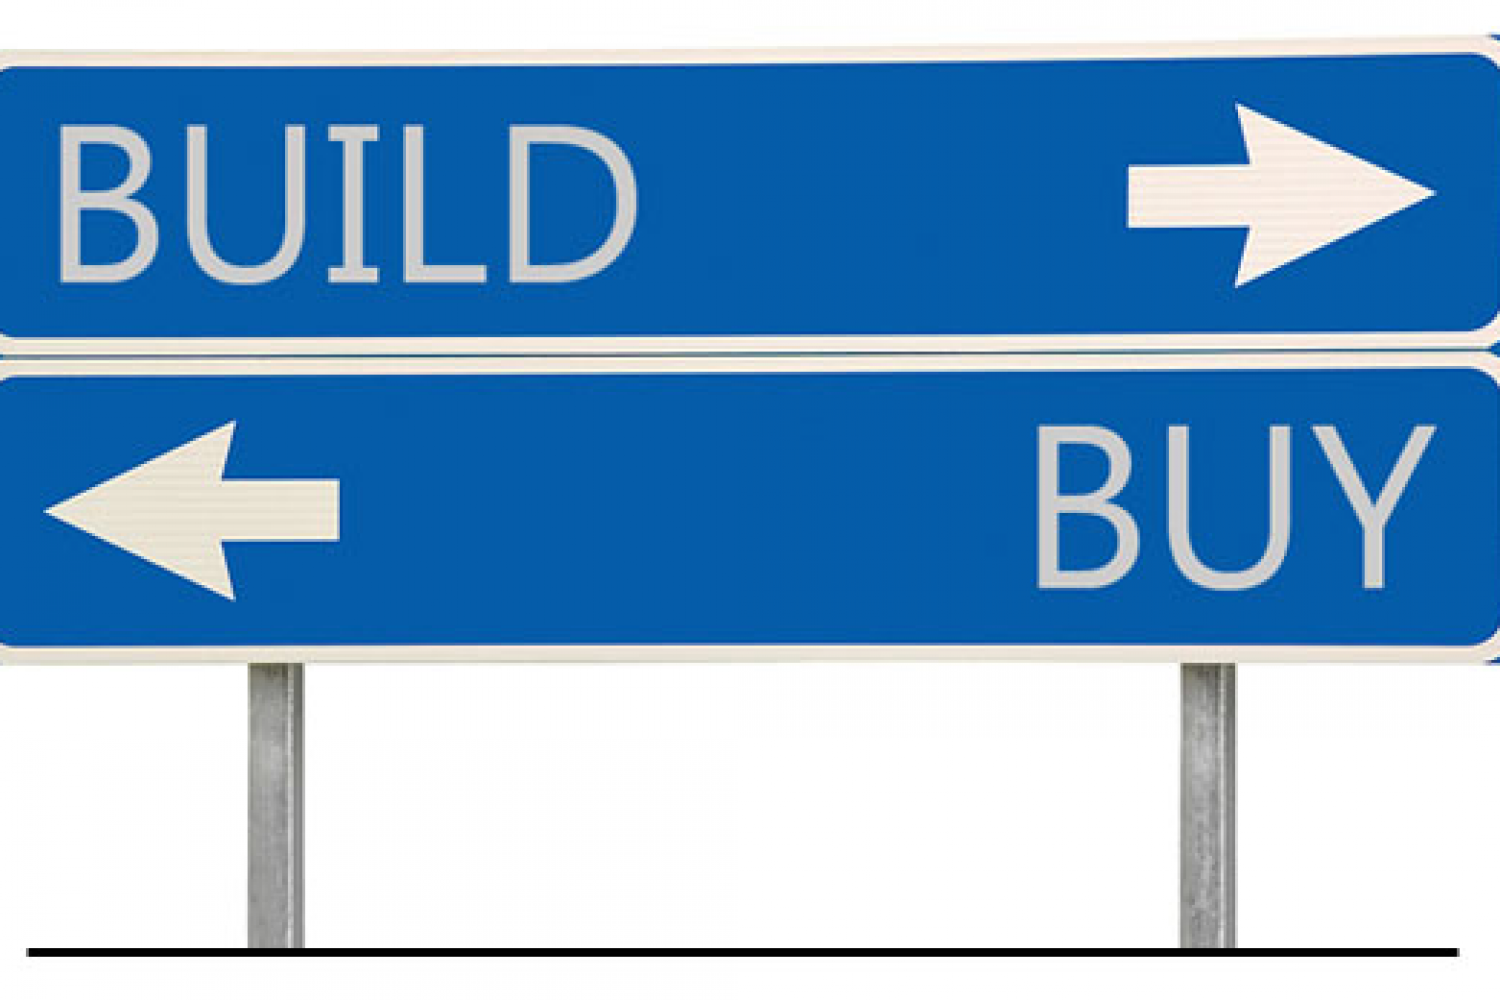
Subjective Cost/Impact Scale

prototype examples

Paper Prototype

Cost: $0 Free

Who you are: A visual thinker, creative and artsy but not technologically inclined.  No budget yet as you’re in the the very early ideation stage.

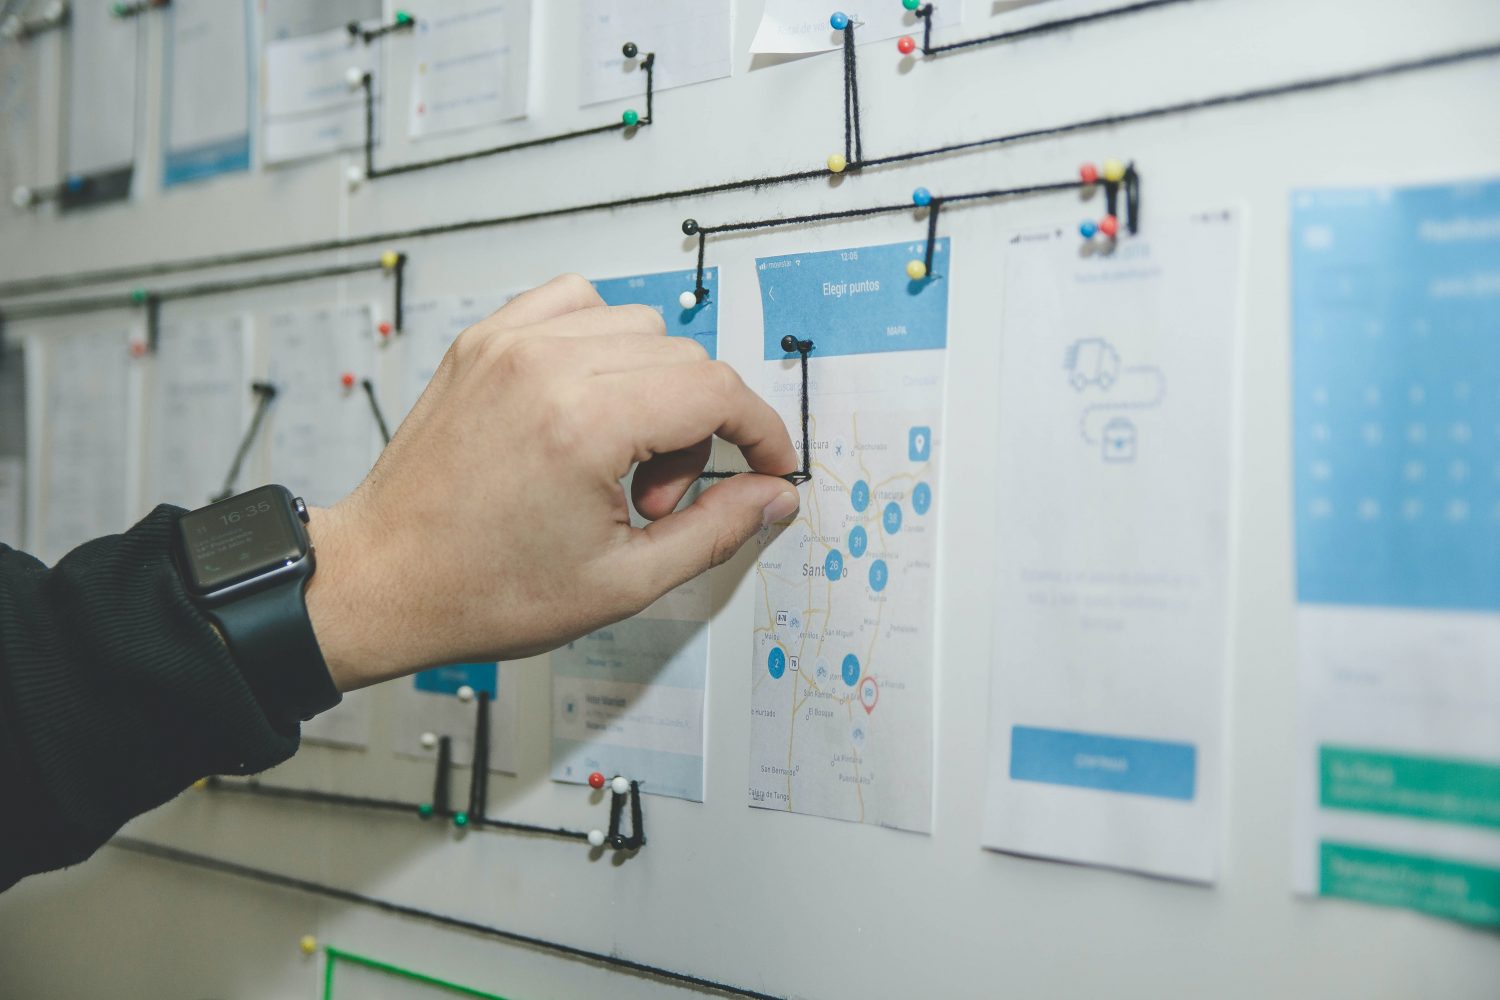
What it is:  A paper mockup of your idea. Perhaps built of sticky notes, drawn on a whiteboard or a large poster board covered in hand-drawn screens showing interactions and flows. Maybe a slider like the one in the picture.

What its good for: Very early visualization, getting your ideas down on paper when the creativity strikes and without the distraction of a computer screen, outlining your vision for a creative or tech person to take to the next level.  Also good perhaps if you’re hoping to get feedback or small investments from friends or family as they would be forgiving enough to overlook the primitive medium.

Pros: Free and easy!  In fact, your kids could even help you out. No technical skill required.

Cons: Requires some creative sense. You could spill your coffee on it and lose your entire concept.


Paper prototyping with cutouts

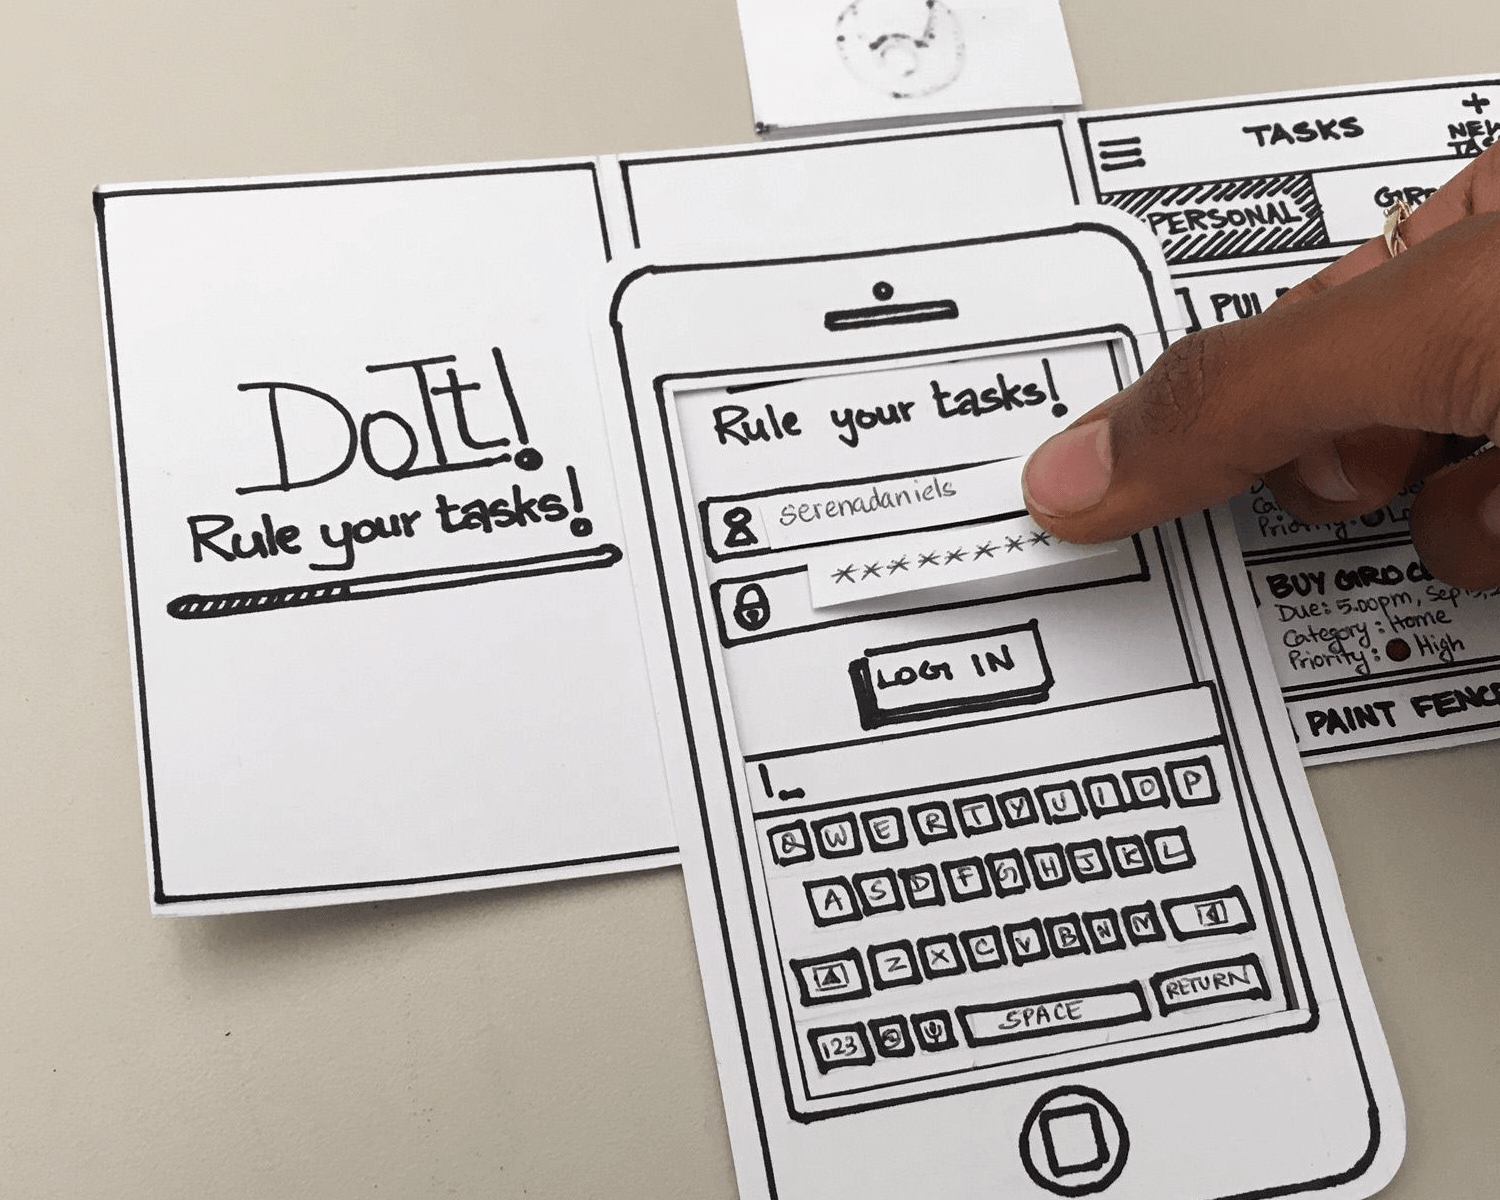
Photo courtesy of Justinmind

Powerpoint

Cost: $ Free to $; it’s probably already loaded on your computer. $160 for a license if you don’t already have it loaded.

Who you are:  A business person dabbling in the creative side to help get your point across as cost-effectively as possible.

What it is: A Windows-based basic presentation program that comes on Windows computers and can be downloaded for Mac.

What it’s good for:  Presenting your idea on a large screen for an audience or a webinar, and meeting with other business people.

Pros: Probably free or at minimum very low cost. It is a surprisingly useful “design” tool for non-designers; easy to use drag and drop, animations, and pre-built shapes. Pretty easy to figure out and will do a good job of walking someone through your concept and functionality. Powerpoint even has some interactive features available.

Cons: Time consuming. Animations and getting things to line up page by page is time consuming. It’s not considered “tech savvy”, so some audience members may find it a little old school.

Check out this impressive video of how someone built an Interactive Powerpoint Prototype

Wireframes

Cost: $ Free or very inexpensive for the basic programs.  Figma is a great free basic option for up to 3 projects, or check out Justinmind if you want something interactive.

Who you are:  Technically intermediate, a process person, analytical. You aren’t much interested in showcasing your idea’s beauty at the moment; right now you care more about the functionality.  You don’t want to draw by hand and you’re comfortable downloading and figuring out how to use a fairly simple new software. You want to convey your idea as clearly and concisely as possible without frills.

What it is:  A visual and simple representation of your app idea using basic shapes to indicate text, images, buttons, etc. that can be easily rearranged.  In the design and development world “wireframes” can and does mean much more, and we do them for the vast majority of our development projects anyway when you are ready to start building, but this article which assumes you’re at the beginning of your journey and not already contracted with designers or developers so it really is just a more advanced way of “sketching” our your idea using a program instead of actually sketching.

What its good for:  Wireframes are useful for helping programmers and designers think about the structure of the app you’re building. Can help get more detailed estimates from development partners. Designers will appreciate that you’re giving them the structure but allowing them the creative freedom to make it beautiful.

Pros:  Inexpensive. Good for a technical audience when seeking feedback and input.

Cons:  While wireframes are essential to most application projects, it’s really more of a behind the scenes look and for some it could come off as a bit boring.  If you’re showing to developers, great. But if you’re hoping to use it to pitch to potential investors or get real user feedback, it might not generate a lot of excitement since it’s lacking the visual aspect.
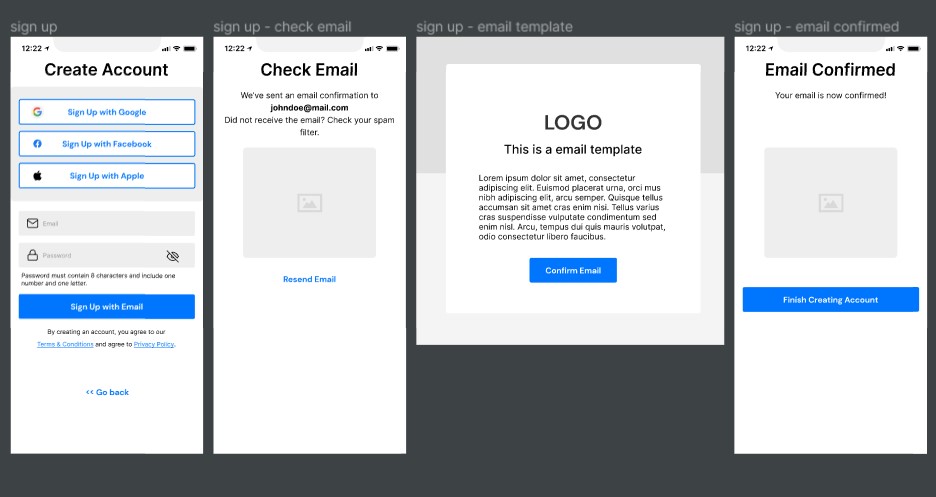
Wireframes example

wireframe prototype

Landing Page

Cost: Varies wildly. $-$$ for a basic 1-3 page professionally designed.  Additional cost for domain registration, hosting, ads to drive traffic to your site, video production, etc.  This guide is pretty solid and doesn’t get too deep into the weeds.

Who you are:  Either a technically-savvy, creative person with experience and/or plenty of time on your hands to lean into doing it yourself, or you’ve got some money to spend to build it.  You are likely a creative, marketing, or sales-type. You have some confidence in your idea and you’re ready to throw some funds behind it to prove interest, quantitatively, before you jump all on.

What it is: A marketing site used to gauge interest in your idea and possibly even capture leads and email addresses for future customers. A place to demo your app if you have anything to show.

What is good for:  If done right it can give you great quantitative data-driven feedback around the interest, engagement, and marketability of your idea. Showing proven interest with data to back it up is phenomenal for pitching to seed investors. Capturing emails of people interested in learning more or being notified when a product is launched is a great way to hit the ground running and build a base of early adopters.

Pros: Relatively affordable. Can be especially useful if coupled with some early designs and videos that demo your idea (though having those adds a lot of cost).  There are plenty of web designers out there ready to help within a short timeframe, and plenty of DIY tools as well if you’re keen to get your hands dirty.  Always good to get your domain name locked down early in the process.

Cons: Steep learning curve and you do have to pay to get traffic to your site. It will likely end up costing more than you think once you add everything up.  If you don’t have much in the way of designs to show yet it isn’t going to get you very far.  May show interest but won’t show you a customer’s willingness to pay.

Totally awesome how-to example: Buffer

UX/UI “Shell” (High Fidelity Clickable Prototype)

Cost: $$$

Who you are:  Very sure of your idea and willing to spend up front in order to seek funding via crowdsourcing and other informal avenues. You have confidence, but not *quite* enough to go all-in.  Perhaps you’re a business founder and have yet to find a technical partner.

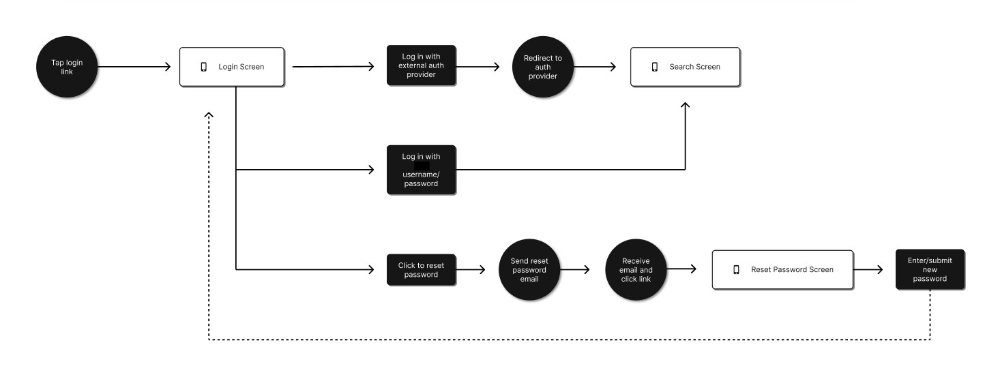
What it is:  An interactive but not fully functional version of your app. Think of it like an Old West movie set. It looks good, the saloon doors open and close, you can walk down the street and sit on the stoop, tie up your horse even. But when you walk through the door you’re in the desert.

What is good for:  Demos, gauging interest, early feedback, and pitching to investors. If building the MVP (see below) it’s a necessary step in the process.

Pros: It’s beautiful, it’s interactive, and visual so no imagination is required on behalf of the user.  It’s impressive and great for showing investors and gaining buy-in. Provides crucial information about the user experience.

Cons: Could be expensive relative to it’s impact unless you’ve at least consulted with backend developers early on in the process. Without effective developer/designer collaboration you could end up with a “tip of the iceberg” problem where the “pretty” 20% front end causes 80% of the feasibility issues or complications on the back end.  Or you could perhaps underestimate how much backend development needs to actually be done to have a functional application. Might be over-featured compared to the MVP app you can actually afford to build, which could turn off some folks who were expecting to see more based on a front-end only version that overpromised on features and functionality.

Functional MVP (Front end & Back end development)

Cost: $$$$

Who you are: Either a technical founder or Founder who has partnered with a strong full stack development team who gets it. You are fully invested in your idea and it’s success and ready to make the leap. You are confident in your solution and just need to test adoption before in order to secure funding or start generating sales so you can self-fund scaling up and out.

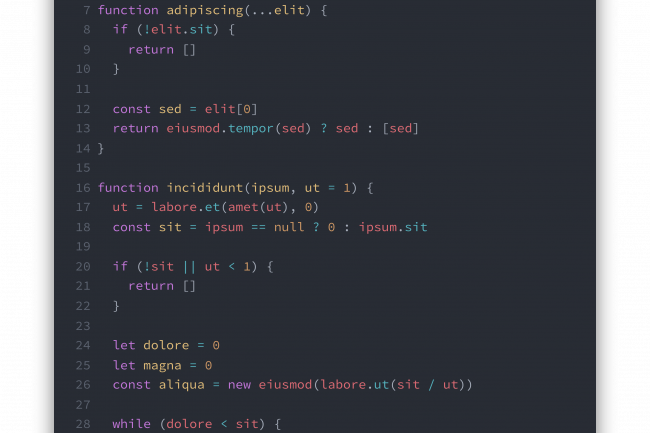
What it is:  An MVP stands for “Minimum Viable Product”, a method of development that defines the bare minimum set of functionalities (features, behaviors) that solve a specific problem.  A scrappy but fully-functioning version of your big idea. This first version lacks bells and whistles and focuses solely on the features that offer value to the users.

What is good for: Validating your idea in the marketplace, analyzing user behavior and engagement with the app, helping prove product-market fit, possibly for pitching to more sophisticated investors, and gathering necessary feedback before scaling.

Pros:  Most impactful type of prototype. It is fully functioning, albeit likely without all of the features you want. If it is a mobile app it’ll be available to download in app stores. Since you didn’t build in all of the features right away you’re able to quickly pivot your idea to better match the needs of the users, thereby increasing your chances of success and not going broke in the process.

Cons: Won’t have all of the features you desire, but if you partner with the right team it will have the features you need to test and prove fit. Most expensive type of prototype.

Example here of a Mobile App MVP we recently launched in the app stores!


The Takeaway

There are many ways to accomplish your goals, this guide covers just six of them.  Depending where you are in the process, a logical progression of turning your app or software idea into a reality may look like Powerpoint to mock up something simple to let others play around with it and get some early user feedback, then a landing page to prove there is some marketable interest, and building a fully functioning MVP to help prove product-market fit and get maximum learnings prior to scaling.  We can help no matter where you are in the journey.  Our consultants-not-coders and product development muscle help you to level up your idea with experienced, US-based technical partnership.  Contact us for a Free Consultation if you’d like to discuss your idea, no matter where you are in the process.  We love what we do and we love helping entrepreneurs and companies with big goals bring their vision to reality.   Oh, and subscribe to keep getting Insights like this delivered right to your inbox.  Best of luck to you!


Too “Fast” to fail? Guess not.

There’s been plenty of coverage about this month’s most “buzzy” startup failure, that of the once darling one-click checkout startup, Fast.  Most coverage focuses on the marketing hijinks and scandals surrounding the founder, Domm Holland, but lack meaty coverage on the subject of why a seemingly great idea failed to prove out it’s tech fast enough generate the most important thing – cash.

We have no interest in joining the scandal circus. But as software development partners to many tech startups and entrepreneurs, we believe failure is an exceptionally valuable learning tool, even if the learnings are based on speculative post-mortems of someone else’s tech startup failure, as we are about to do here.

The Tech

At it’s most basic, Fast is just an automated form filler, a sort of “Identity API” that combines identity and checkout into one “frictionless” and (we had to say it) Fast transaction.  The tech uses cookies, IP addresses and other information to track users on a device, and their email to track them across devices.

The Value Proposition

No retailer registration, punching in credit card details, or remembering usernames and passwords = great for consumers. Just one tiny click between you and that impulse buy = great for sellers.  Open source, well documented API = great for developers.  Large market with opportunity for improvement and consolidation?  Check.  Amazon’s pioneering one-click checkout patent had expired 5 years ago and no one leader had emerged yet? Check.  It all looked great, attracting investment and huge valuations.

So what the heck happened?!

What we know based on media reports is that Fast was reported to have only produced $600,000 revenue in 2021 despite more than a half-billion dollar valuation, and by some estimates was going through up to $10 million a month cash (aka “burn”). And it added 400 people to its headcount.  In short, according to the founder, Holland, their burn and hiring scaled exponentially faster than their revenues scaled, and they couldn’t get it in control and raise new capital fast enough to keep the doors open. In his words,

“…[people] are wanting this kinda salacious story. The reality is was [sic] far more boring. Our burn was just far too high at the end.” – Domm Holland

So, wait… it was just cash burn that killed Fast so fast?   Well, yes and no. 

A lot goes into “burn”, but we help startups developer software products – not finance – so we won’t get into how much to burn and when.  But there are some important factors to point out that may have contributed to or exacerbated the problem. Lets deep dive some of the issues and corresponding strategy concerns with each.

  1. They failed to onboard many big-name customers despite moving aggressively into the Enterprise space. In fact, they onboarded just one before closing their doors.
  2. Did they really save shoppers time when shoppers were already integrated with the auto-fill functions of Google Chrome and Apple browsers?
  3. Fast’s button would never be welcome inside behemoth payment ecosystems such as Amazon and PayPal owner eBay.
  4. Companies like PayPal, Apple, Bolt and Shopify offer similar services. Holland argued Fast can do it “more quickly and seamlessly than others”, but failed to prove it.
  5. Former Fast engineers told NPR that integrating the tool on merchant sites was challenging, and some sellers reported that it did not always function as promised.
  6. They thought their competition was PayPal, and therefore likely ignored what ended up being their actual competition, Bolt.
  7. Bolt said that about 10 million shoppers had signed up for its services as of November 2021, and PayPal, by comparison, said that it had 426 million active accounts.  Fast never shared shopper numbers, only saying “thousands of merchants” had signed on.  Merchants we now know to be small. So it is probably safe to assume far that less than 10 million shoppers ever actually signed up for Fast.

What can we learn from this? 

“There’s a lot of stuff that you’ve got to build. For enterprise it’s not just about having an enterprise-grade product, eCommerce is very fragmented – right. Lots of different platforms, lots of different integrations. A lot of stuff that you gotta build before you can actually onboard enterprise. Bolt had just been building all of those integrations for a lot longer. They had been chipping away at the sort of medium-sized business. (Fast had onboarded a lot of small partners, and a few large ones but had largely ignored the middle market) …enough to kind of give them this foundation now that they can go and raise [capital] from.”  – from VC20 interview with Domm Holland

Lesson #1: Don’t Underestimate your Competition
Whether it was due to hubris or simply failing to do proper research, Fast focused on beating PayPal when, in fact, it was Bolt they should have been watching. And indeed they may have ignored alternative solutions, like auto-fill functions within browsers.

Lesson #2: Validate your Technical Assumptions prior to Scaling
Had Fast conducted technical due diligence and fully understood the complexities involved in onboarding Enterprise customers, perhaps
they would have made different hires on the tech team, made sure their tech was proven before going after the Enterprise space, or simply slowed down. It is reported they were having issues with even the smaller client custom integrations, so jumping from small clients to Enterprise without proven tech or a critical mass of users may have left them desperate to hire and contributed to the cash burn.

Lesson #3: Your Value Proposition must be Solid before Scaling
Your unique value proposition should deliver on the intersection of:
1) What your do really well
2) What customers really want/need
3) What your competition does NOT do well
Unfortunately for Fast, they really didn’t do what they promised well enough (yet), the depth of pain/customer need was debatable, and they competed in a space that their competition DID do well. This isn’t to say that they shouldn’t have tried, but proving your value prior to scaling could have saved the company. See our software development process to learn more about developing an MVP prior to scaling.

Fast Checkout Failure Infographic

Sources & Further Reading:


Custom Web Application Development vs. Off-the-Shelf

Custom Web Application Development vs. Off-the-Shelf

Web Applications are an exceptionally broad category. At their core, however, they are simply this: an app that’s accessible from any browser, on any device.  

They don’t require downloads, like a mobile app or desktop app, so they take up very little space.  They can connect to complex backend architecture and other software programs seamlessly when built correctly. They won’t work offline and the UX will vary slightly depending on browser and device type, but they get the job done. That said, you may be faced with budget constraints and considering whether you can buy an off-the-shelf solution. Let’s dive in here to help you work through the conundrum of “Buy vs. Build”.

Buy vs. Build

The primary question you should be asking yourself is this:

Does the purpose of the application DIFFERENTIATE YOU and SET YOU APART?

If you answered NO, look at off-the-shelf solutions. There are TONS. Need a CRM? Salesforce. Need accounting? QuickBooks Online. Need an eCommerce solution?  Magento. The list goes on.  We can help you integrate and implement off-the-shelf applications via custom API development using scalable and secure architecture practices. Heck, we’ll tell you if we think that what you’re asking for can be best served by an existing solution.

However, if you answered YES, then you’ll need a strategic partner to help build your “uniquely you” web application. We will likely still end up integrating your custom web app with existing SaaS application solutions, such as billing, eCommerce, and logistics.

Developing a Web Application

Web application projects follow our core process, starting with Strategy and Discovery with Product Managers and our client-facing Developers at the table, choosing from technologies best suited for your needs with UX, security, and scalability prioritized every step of the way.  Critical aspects we consider for web apps are:

  • Mobile-Friendly Interface
  • Push Notifications
  • Security
  • Admin Panel/CMS
  • Reporting & Analytics
  • Live Chat (if appropriate for your business)

See also: Web Application Case Studies

About Us

HSTK (Haystack) is a custom web application development company with hubs in Indiana and Arizona. With product management muscle built into every project we ensure your goals are aligned with the outcomes. Our client-facing developers make it easy to communicate and interpret your visions so you build it right, the first time.  We’re a friendly and collaborative crew, so feel free to reach out anytime for a no-pressure conversation about your project idea.

Subscribe to HSTK Insights

Websockets Redis Setup in AWS Elastic Beanstalk

Websockets in AWS
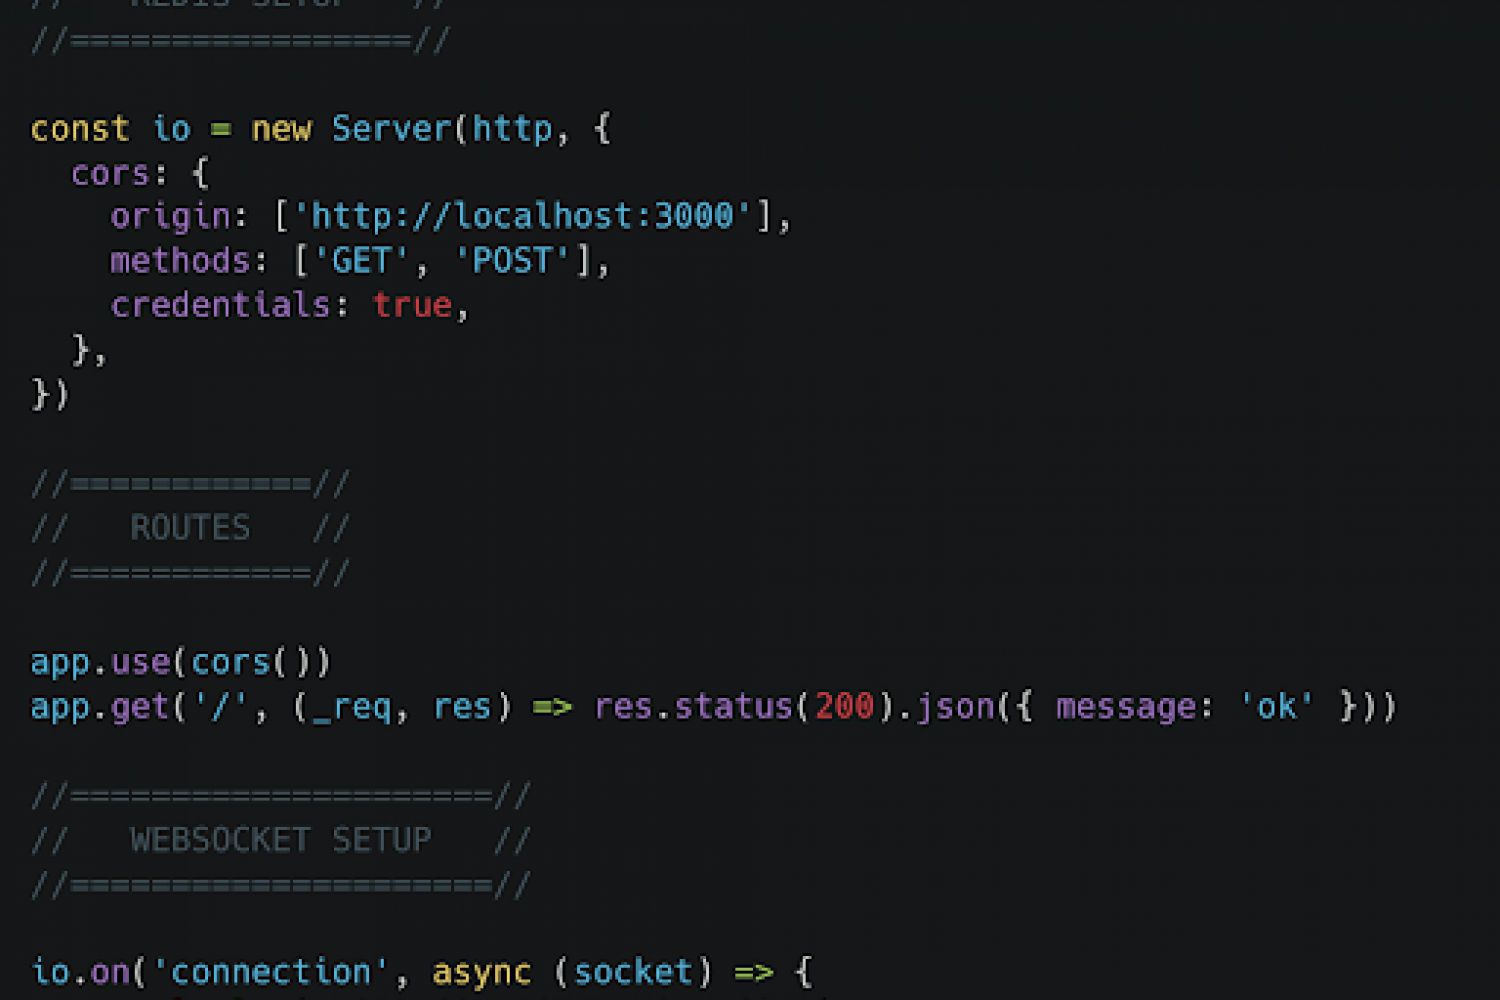
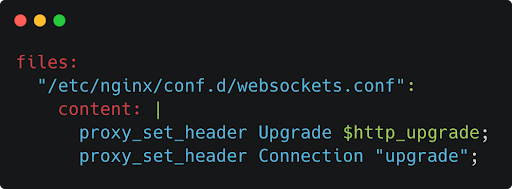
Websockets/Redis Setup in AWS Elastic Beanstalk

For context please read our post on How to Create Scalable Real-Time Applications in AWS first.  

This document will serve as instructions for setting up your auto-scaling Elastic Beanstalk environment to use websockets with Express, Socket.IO and Redis. If you are using something other than Socket.IO for your websocket implementation, you’ll still need to follow these steps to get your environment set up.

Please note: This is the simplest set up that you can have. This will be using the bare minimum for Elasticache, Elastic Beanstalk, and websocket implementation. It is meant to be a foundation that you can build upon, not a production ready service.

Create Elastic Beanstalk Environment

Elastic Beanstalk Environment

Before we create our Elastic Beanstalk environment, write a basic version of your server with a simple implementation of websockets. For example, here’s what a bare-bones Node server would look like.

Now that you have your server written up, you’ll also need to create a few other files to ensure that your environment is set up correctly.

We’ve only been able to make the following work by having these configs set up when creating the environment. We were unable to change these settings later and actually have them applied.

That being said, other users seem to have had success using a .platform directory to issue an nginx restart command to apply settings post-creation.

.ebextensions/websocket.config

.ebextensions/websocket.config

Procfile

procfile

(In the Procfile, make sure the command after “web:” is whatever command you want the server to use to run your server in production)

Once you have all of the necessary files created in your project, compress them into a zip file. Then follow these steps to deploy your code.

  1. Log into your AWS Management Console
  2. Go to the Elastic Beanstalk Console
  3. Click on Environments in the navigation menu on the left side of the page
  4. Click the Create a new environment button on the table that appears
  5. Choose a web server environment and click Select
  6. Give your application a name, the environment name will automatically be populated
  7. Choose whatever platform your server should be deployed on
  8. For Application Code, select Upload your code and then supply the zip file of your project
  9. Click the Configure more options button if you would like to access advanced settings about the project
  10. When finished, click the Create environment button. This will take around 5-10 minutes to deploy your new server

Create Redis Instance with Amazon Elasticache

If your service has no need for auto-scaling or multiple servers, and it can be a single node, then you can skip this step.

Websockets work by establishing and maintaining a connection with a given server on the backend, allowing duplex communication between the client and server. In a horizontally scaled environment, or one with multiple servers, this becomes a complicated problem. What if two clients that need to share events are connected to two different servers? How does one server know what happened on the other server and communicate it to their client?

This is where Redis comes in. Redis is an in-memory data structure store, but more importantly it provides us a mechanism for implementing a publish-subscribe pattern. Using this, all of our servers can publish and subscribe to events from Redis, and then all of the servers will receive the same events and can react accordingly.

1. Create a Security Group for your cache

To set up a Redis cache in AWS, we’ll use a service called Amazon ElastiCache. Before we can do that though, we need to create a Security Group that we’ll apply to the cache when we create it.

  1. Go to the EC2 Dashboard
  2. Select Security Groups from the Resources table in the dashboard or from the navigation menu on the left side of the page
  3. Click the Create security group button on the table that appears
  4. Give it a name related to your cache
  5. Add an Inbound Rule like the following. In the search bar, look for the security group containing your Elastic Beanstalk EC2 instances. This will allow your servers to talk to your Redis cache (when it exists).inbound rule
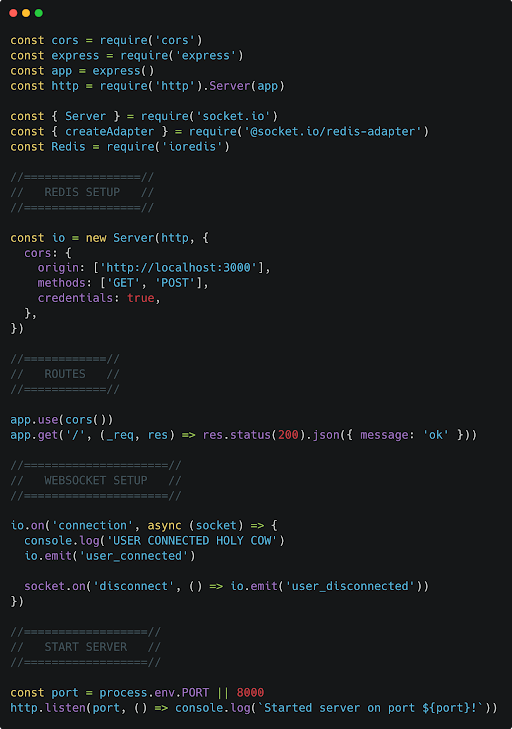
1. In order to find which security group you need to search for, it might be helpful to go back to the Security Groups table. Look for one with the same Name as your EB environment, and with a Security group name that contains the words “AWSEBSecurityGroup“. Copy that Security Group’s ID.

2. Create your Redis cache

  1. Go to the ElastiCache Dashboard
  2. Click on Redis in the navigation panel on the left side of the page
  3. Click the Create button on the table that appears
  4. Leave the Cluster Engine as Redis and the Location as Amazon Cloud
  5. Add a name and optionally a description
  6. For a non-production service, I would change the Node type to be something smaller and uncheck the Multi-AZ box.
  7. For a production service, I recommend reviewing the 5 workload characteristics to consider when sizing Redis clusters. Read more here.
  8. Change the security group to your cache security group that you created in the previous section
  9. Set everything else to your preference and click the Create button in the bottom right corner of the page

Once your cache is created, go back to the Redis table and inspect your cache. There you can find connection information to include in your server, like the Primary Endpoint field.

3. Connect your server to your Redis cache

This will vary depending on your project, but more than likely you’ll have it set up to use some environment variables to take in the Redis connection string, and then you’ll have to implement using Redis yourself. If you’re using http://socket.io , this is pretty straightforward since they’ve created an adapter for Redis on their own.

All I had to do was add the following to my server set up:

server setup

And then add the REDIS_HOST and REDIS_PORT environment variables to my Elastic Beanstalk environment’s configuration. Again, you can find these values by inspecting your cache in the ElastiCache console and looking for the Primary Endpoint property.

Configure Load Balancer for Sticky Sessions

If your service has no need for auto-scaling or multiple servers, and it can be a single node, then you can skip this step.

The last step that we need is to configure the load balancer to enable sticky sessions. This is important in multi-server deployments so that websocket connections made with a given server will continue to engage with that server for the remainder of the connection.

1. Configure Target Group in Elastic Beanstalk

  1. Go to the Elastic Beanstalk Console
  2. Click on Environments in the navigation menu on the left side of the page
  3. Select the environment containing your websocket application
  4. Select Configuration in the navigation bar on the left side of the page and scroll down to Load Balancer. Click the Edit button.
  5. Check the box next to the default process in the Processes section. Click Actions and then Edit.
  6. Under the Sessions section, check the box next to Stickiness Policy Enabled.

2. Configure Load Balancer Stickiness

  1. Go to the EC2 Dashboard
  2. Click on Load Balancers in the navigation bar on the left side of the page
  3. Find the load balancer related to your Elastic Beanstalk environment and check the box next to it
  4. In the Listeners section, select the main listener that forwards requests to your target group and click Edit
  5. In the main action, check the box next to Enable group-level stickiness
  6. Set the duration for whatever you feel is best for your project
  7. Click the Save Changes button at the bottom of the page

And that’s it! Your service should be completely set up to handle websocket connections and pass along events to anyone that should receive them.

Would you like us to email a copy of the documentation?


Resources


How to Create Scalable Real-Time Applications in AWS

With the exponential rise in online communication and collaboration demand, many entrepreneurs and business teams are seeking to develop software applications that have some sort of real-time component.

Those same teams are increasingly moving to the cloud.

You can’t discuss the cloud without discussing AWS, the worldwide leader in cloud service providers, and you can’t discuss real-time applications that need to scale without considering Websockets (a preferred communication protocol).

But when you consider AWS Scaled Systems and Websockets together things get complicated.

We’ll dig in, but first let’s get some context out of the way:  What are some practical uses for real-time applications? What factors should I consider when thinking about the scalability of my application idea? Why host my application in AWS?  What are Websockets and why should I care?

And for the more technical-minded among us:  When should I use Websockets vs. HTTP? How do I get websockets to work in a scaled system in AWS?

Practical uses for Real-Time Applications

If your application or software idea relies on instantaneous communication, visualization, and/or the need to sense, analyze, and act on data as it happens, then you need real-time.

  • Chat Functionality
  • Calendar, Appointment Scheduling
  • Location-based tools
  • Collaboration
  • Real-time Feeds –  likes, shares, notifications, etc.
  • Data Visualization
  • Multiplayer Games
  • User Data – ie Click stream, error reporting
  • Sports Updates
  • Multimedia Chat
  • Online Education

What factors should I consider when thinking about the scalability of my application idea?

  • Usage
  • Amount of Stored Data
  • Required Speed
  • Anticipated Demand Load Spikes
  • User Experience
  • Developer Hand-off

Why host in AWS? 

While cloud-hosting provider choice depends on the project, for the sake of this conversation we’ll focus on AWS.  Based on AWS’s size, power, flexibility, and that there is tons of customization and support for many third-party integrations it is often one of the main choices.  Its also pretty cost-competitive, you pay for what you use. And, importantly, auto-scaling comes “out-of-the-box” in a way that requires less custom configuration, saving you time in the development phase of your project.

What are Websockets – and why should I care?

As discussed, the demand for real-time information – the millisecond it becomes available – has hit critical mass.  If you have to refresh the page to get new information or the connection is slow, it’s already too late. Your user bails.  In laymen’s terms, websockets is a web-based communication protocol that allows for two-way interactive communication session between the user’s browser/application and the server where the information/data is stored.  Basic communication protocols, such as HTTP, technically only allow for one-way communication.


Example:

You are trying to build an app for restaurant reservations. Your developer uses HTTP, not Websockets.  Both User A and User B are searching availability for a table at 7:00pm on Saturday, and there is just one table left.

Using an http communication protocol the flow would look something like this:

User A –> table available > books the table at 6:00:01 > success > connects to server for confirmation (pause to wait for response from server) > success

User B –> table available > books the table at 6:00:012 > success > connect to server for confirmation (pause to wait for response from server) > failure

Both users experience “success” booking the table because there is a lag between User A booking the table and User B finding out the table isn’t available. User B thought they had secured the reservation, only to find out they actually didn’t after the fact, leading to poor user experience with the app.

Using websockets it would look like this:

User A –> table available > books the table at 6:00:01 > success

User B –> table available > attempts to book the table at 6:00:012 > Sorry, table no longer available

User B finds out instantaneously that the table is no longer available, and can proceed with searching for other available tables versus thinking they have the reservation and waiting to find out they actually don’t. This is a more gratifying user experience.

While this is an overly simplified example, it illustrates how the bi-directional communication using websockets for 2 users attempting to secure the reservation for the same table from the server allows the user to see true real-time availability.


Determining whether to use WebSockets vs HTTP:

  • Does your app involve multiple users who need to communicate with each other?
  • Does your app need to work with server-side data that’s constantly changing?

If you answered yes to either of these questions, consider using WebSockets.


http connectionWebsocket connectionImage Source


How do get websockets to work in a scaled system in AWS?

While building a mobile app for a health startup who required real-time messaging and notifications in a multi-server AWS cloud environment we discovered that “out of the box” the AWS load balancer would not maintain websocket connections from several clients to multiple servers simultaneously. The app would communicate with the load balancer, but the default AWS load balancer wouldn’t communicate with the servers via websocket protocol. Instead of leaving our client hanging and passing it off to a network administrator to deal with the deployment concerns, we engineered a solution that we feel may assist many other devops teams when running into this issue. View the documentation here.


Most Reviewed Software Development Companies in Phoenix

HSTK Recognized as One of the Most Reviewed Software Development Companies in Phoenix

Most Reviewed Software Development Companies in Phoenix

HSTK Haystack is a client-oriented software development company. We provide our partners with the tools and skills they require to build outstanding experiences. Moreover, we help our customers create solutions with utmost efficiency and precision. Today, we’re pleased to report that we’ve been recognized as a leading service provider in 2022. Right now, you can discover us on The Manifest as one of the most reviewed software development companies in Phoenix!

With the modernization of the business space, there was a demand for technical proficiency in software development. But we believe that what separates a great developer from others is having the dedication to build unparalleled software as if it was their own. For this reason, we banded together, and HSTK Haystack was established — all to build exemplary digital products alongside our partners.

Most Recent Review

Riders United is an outdoor-oriented startup that partnered with us to build a one-of-a-kind mobile solution. We helped the client conceptualize and plan the digital side to craft a tailored experience.

The client was impressed with the quality of the deliverables and was satisfied with the project management. Here’s what they said about the engagement:

“They’re very helpful — a lot of the technology is new to me, but they make it clear cut. Overall, they’re a great company, and I can’t wait to work with them in the future.”

— Shane Routery, Owner, Riders United

In 2022
The Manifest announces the top B2B companies in Phoenix, and we’re proud to be recognized as one of the most reviewed software development companies in the area. We would like to thank all of our partners for being incredibly supportive and giving us such wonderful feedback.

If you’re interested in building a product with us, please get in touch and let us know how we can help!

The Importance of MVP in Mobile App Development

Mobile App Development MVP

What are MVP’s (Minimum Viable Products)?

An MVP is a method of developing software that defines a bare minimum set of functionalities (features, behaviors) that solve a specific problem and allows companies to study the user’s experience with the app. It can also be used to validate an idea in the marketplace.

In short it’s a stripped down, bare bones, scrappy version of your big idea so you can test and validate before making a huge commitment. In some cases it can be used to prove adoption and secure funding, in other high-risk applications it can be used with a select set of users to identify potential concerns early on in the process.

This first version lacks bells and whistles and focuses solely on the features that offer value to the users.

Why are MVP’s important in the mobile app development process?

An MVP of your mobile app has many important benefits, giving you the ability to:

  • Test market demand
  • Prove adoption
  • Helps prevent unnecessary and unwanted feature creep
  • Provides essential early feedback
  • Test in real market conditions
  • Reduce uncertainty of product failure
  • Collect maximum learning from minimum resources
  • Validate or invalidate assumptions
  • Helps to reduce costs, resources, and time

MVP Design Process

Assuming you’ve done your research to determine market need, nailed your value proposition, and determined your MVP’s priorities it’s time to start the design & development process.

  1. Map out User Flow
  2. Design Wireframes
  3. Backend Coding
  4. Designs

User flow example

user flows

Wireframes example

wireframes

Backend Code example

backend coding


As one of the top mobile app developers in Indianapolis and Phoenix, we’d love to discuss your project!  Contact us for a Free Consultation.

Also, this post is just the tip of the iceberg… sign up below to be notified when New Insights are posted